Compass
|
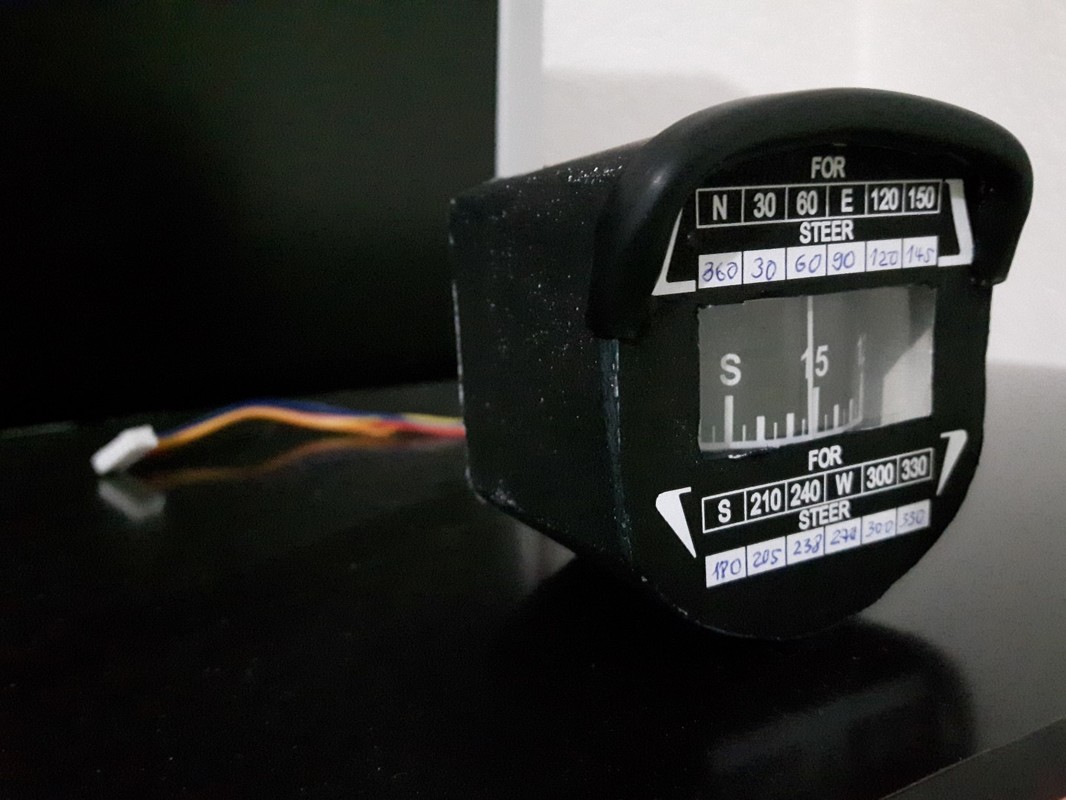
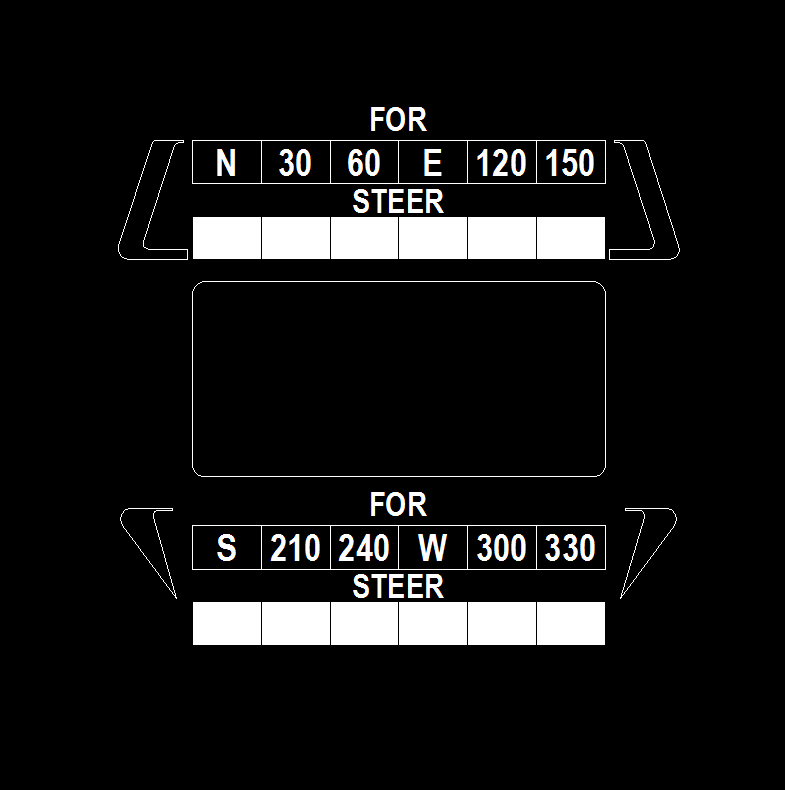
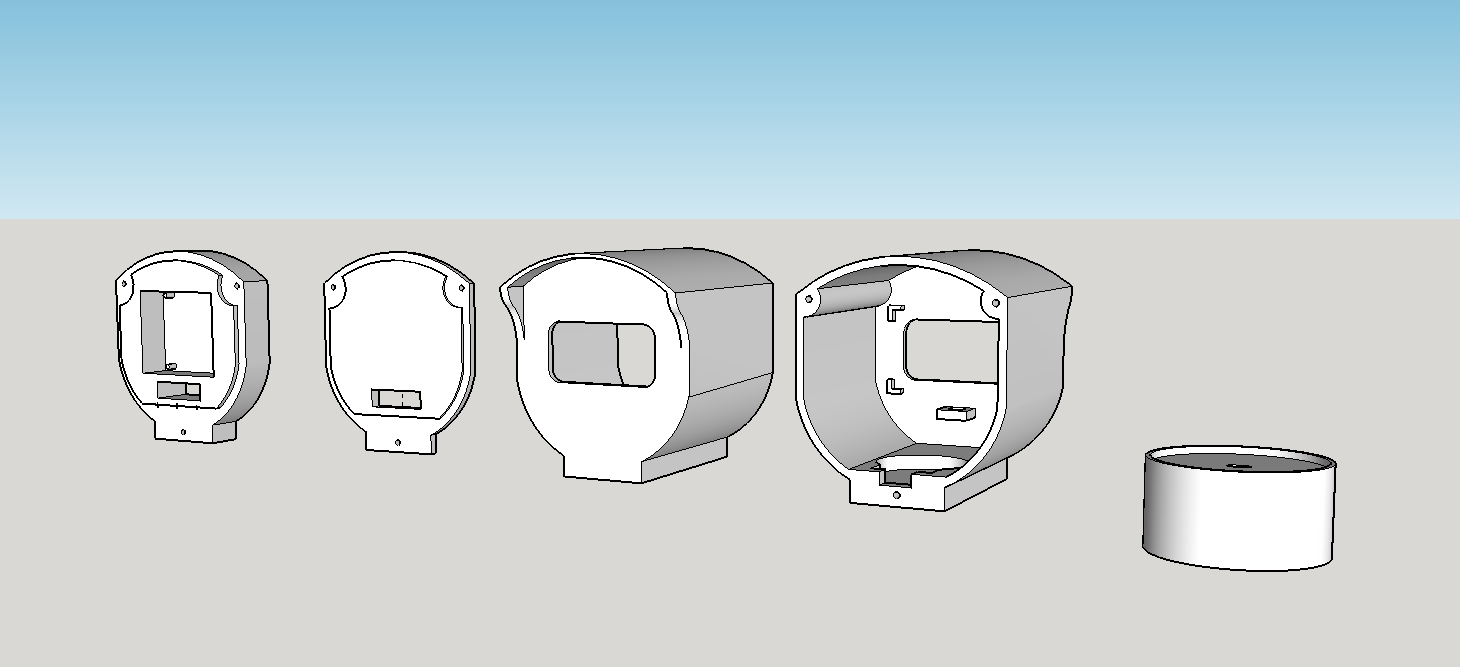
Next is the Whiskey Compass. It would be better to 3D Print one but I don't have a 3D Printer neither do I have someone nearby that could print it for me so I only have one option: to build it myself from scratch. I have build a couple of Rc airplanes and used the Dollar tree foam which is a great material i think for doing different things. This came to my mind while thinking about the Compass. It would be best material to work with and, easy to use and will look great after applying a designed plate printed on a sticker. So let's start. |
|
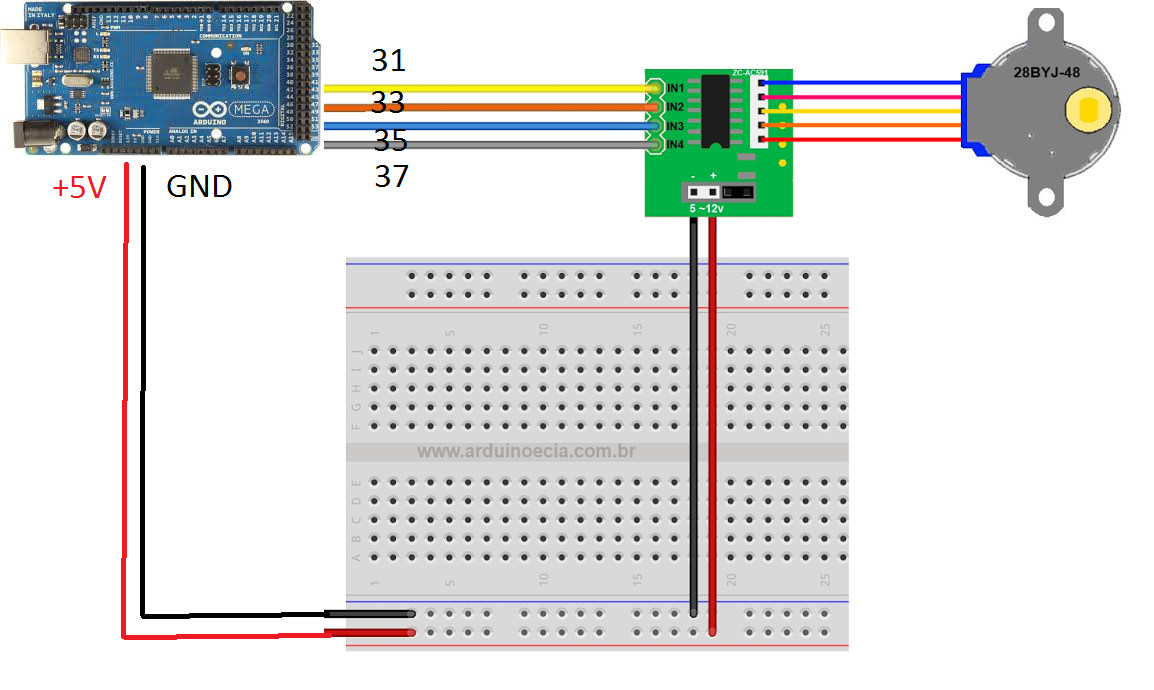
Connect 5V ULN2003 28BYJ-48 4-Phase Stepper Motor input wires to Arduino pins (in my case 31, 33, 35, 37) and +5V and GND according to the picture below.
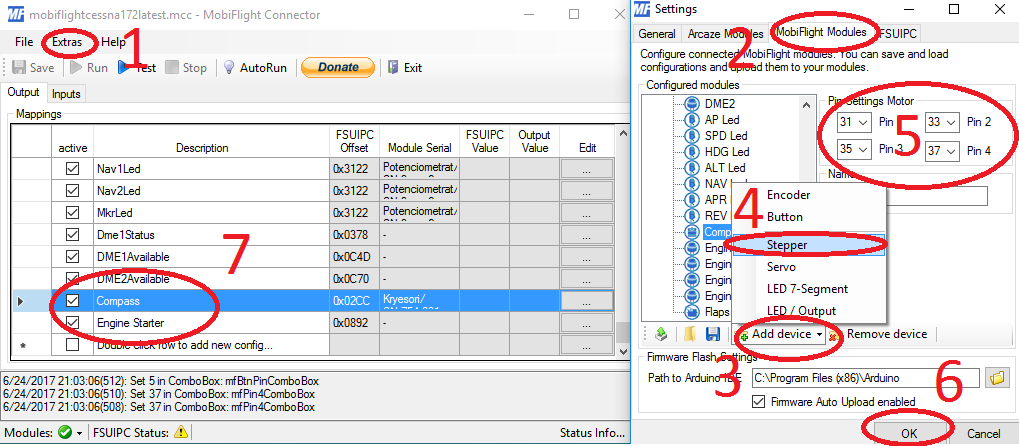
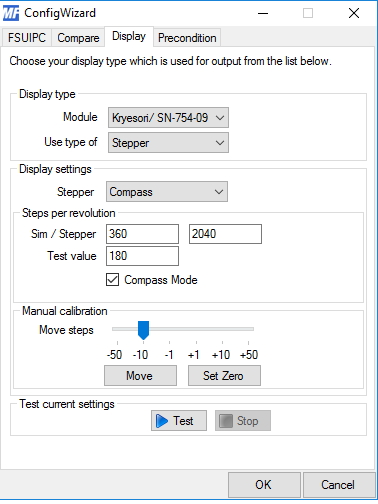
Insert a new Stepper device like the picture below, define the pins of the arduino you want to use like the picture below and configure the settings.
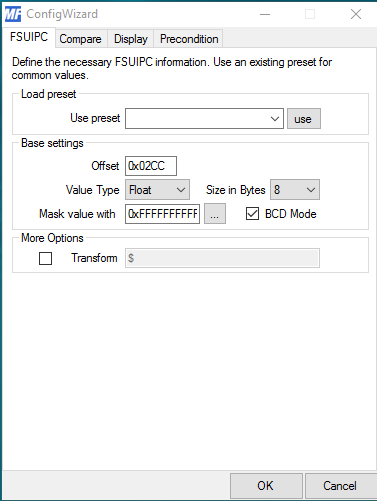
In the next picture you see the compass offset:
|
|
In Case your Compass turns in the wrong direction, than in Interpolation settings use the values
0 - 360
360 - 0
When you start the Sim, make sure to move the motor to the N position using the Manual calibration section by clicking the button move (last picture). Once the needle is on the letter N, click the button Set Zero and you are set.
In Case your Compass turns in the wrong direction, than in Interpolation settings use the values
0 - 360
360 - 0
When you start the Sim, make sure to move the motor to the N position using the Manual calibration section by clicking the button move (last picture). Once the needle is on the letter N, click the button Set Zero and you are set.
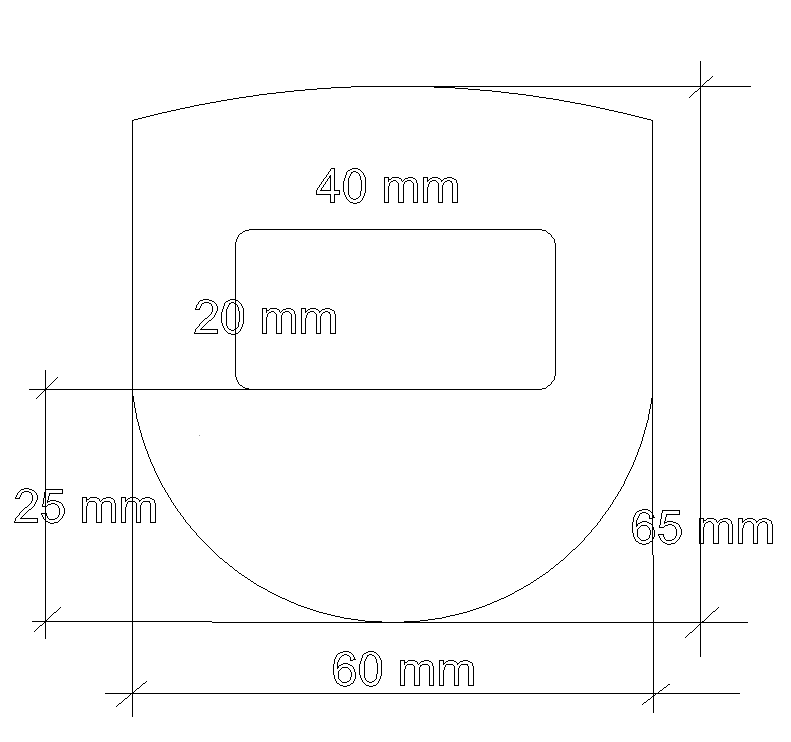
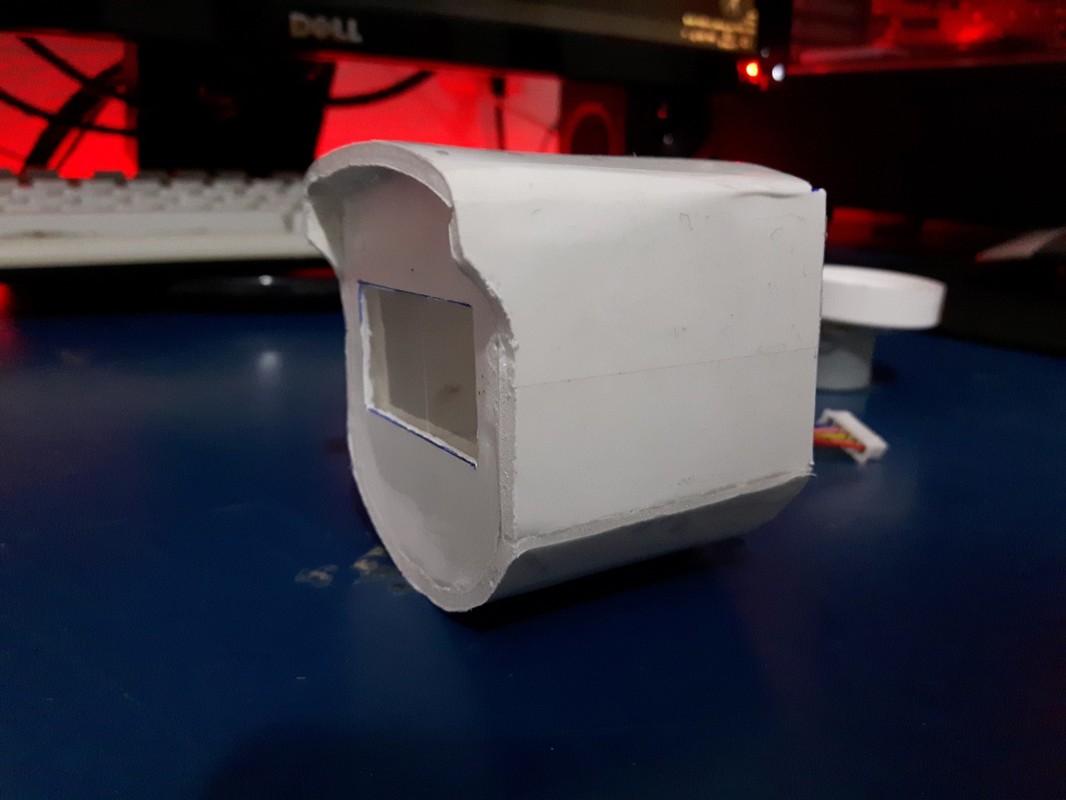
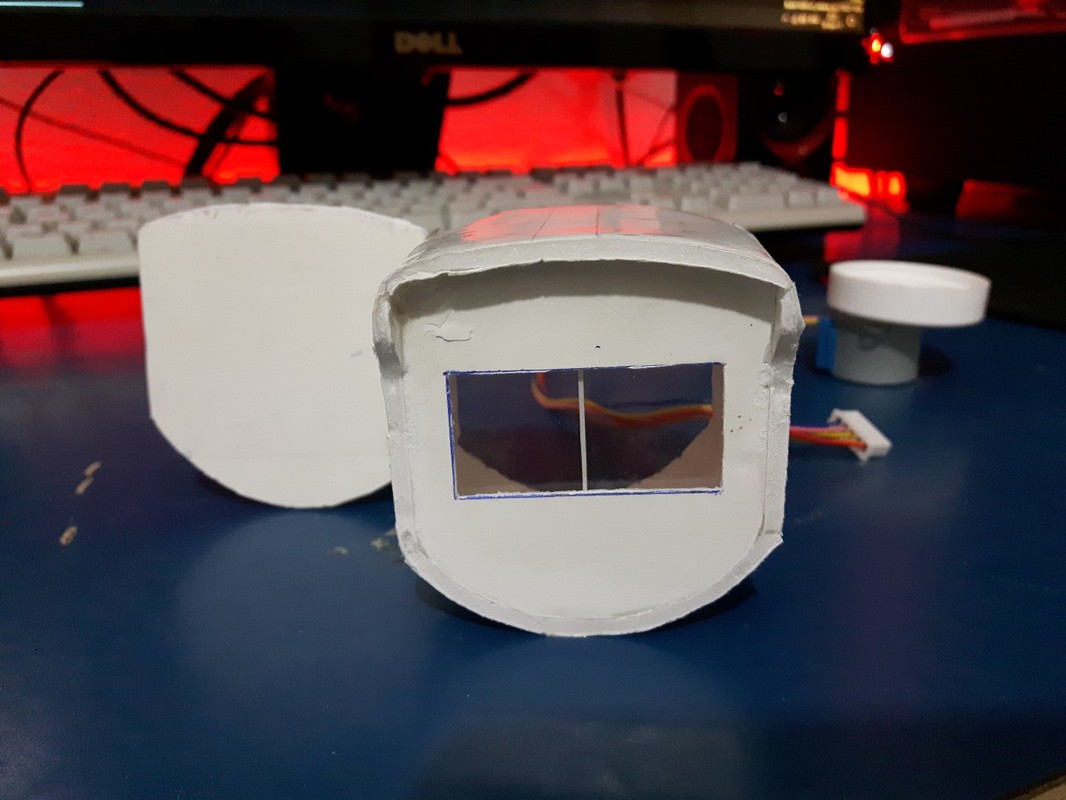
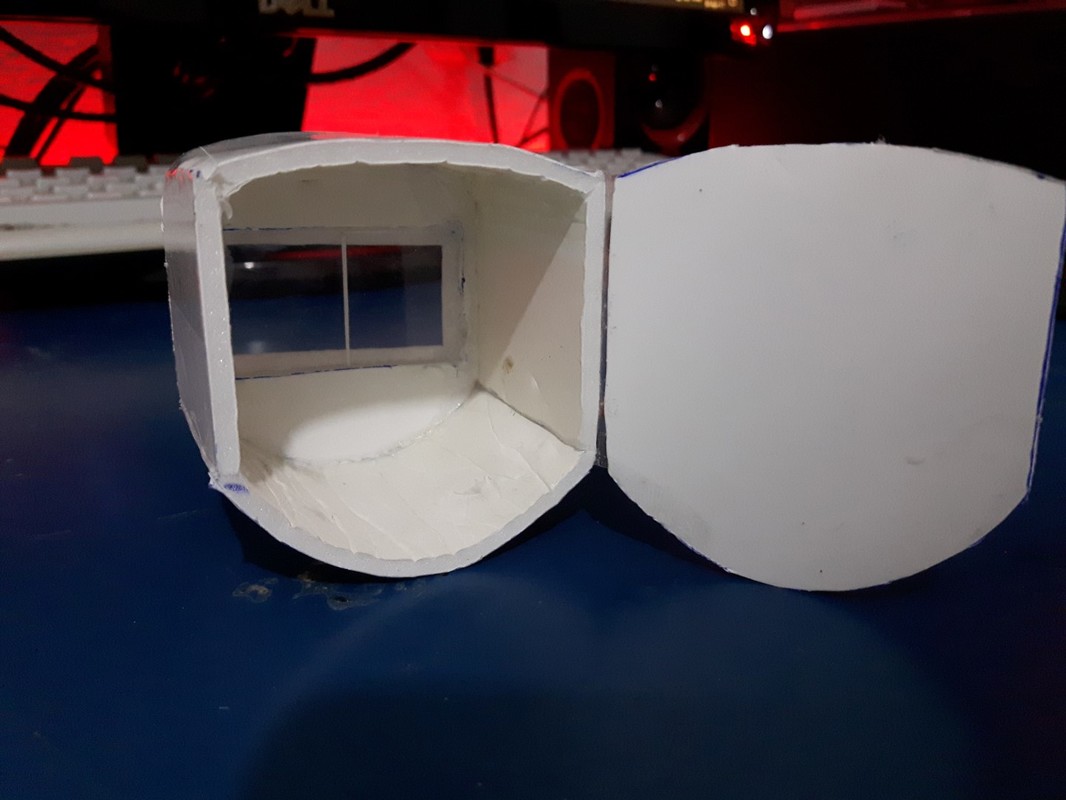
I used to build few rc Planes in the past, i love rc flying as well, here in my website you can see also stuff about rc flying, so i had laying there an rc plane i used to build which was called "Dusty" from the movie "Disney's Planes". I had the plans from FliteTest. It was a nice little plane but i didn't fly it for a while and my son used to play with it so it wasn't in a good shape so i thought he should change shape :). The plane was made from dollar tree foam. It is a great material to work with, very light and it was perfect for the Compass. First i drew the front face while looking at A2A's Cessna 172, printed it in a paper and cut to size.Than made the form of the compass with dollar tree foam. As i said it is great and easy to work with. You can use either hot glue gun or CA glue .
|
|
|
|
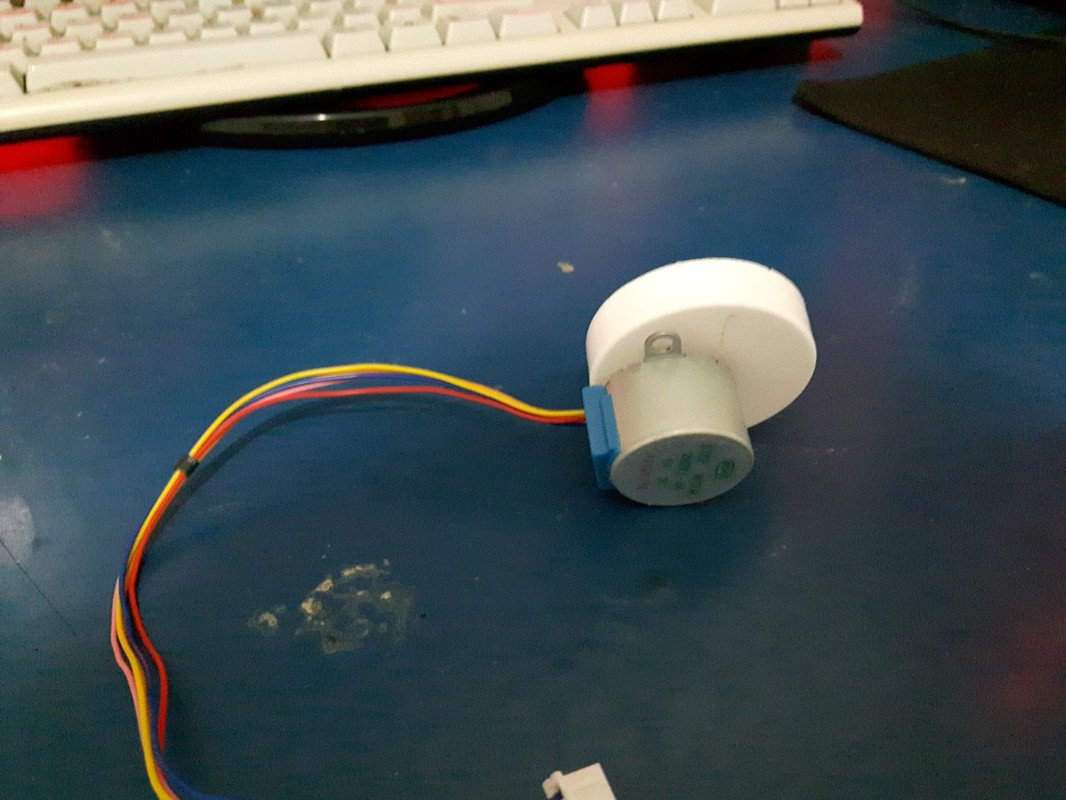
I used the plastic CD case, cut a piece from a white paper sticker as the middle marker. Used CA glue to glue the piece plastic on the opening part of the compass. I found a cap with an outer perimeter of 146 mm, drilled a hole in the middle and using hot glue gun i mounted it on the stepper. The stepper I have used is a 5V ULN2003 28BYJ-48 4-Phase Stepper Motor with Driver Board for Arduino (link on ebay)
|

|
|
|
2015, Copyright AlbEAGLE